Last time when SmartyAds DSP celebrated scoring the title of high performer on G2 we announced the arrival of the new feature called ‘optimization rules’. Now that it is already released we are happy to showcase to you how this feature works so that you could augment the performance of your advertising campaigns to a brand new level. Let’s dig deeper to understand what this new functionality is about and how to configure it so that it delivers the best possible results.

Bringing a better targeting and budget allocation
With new smart ‘optimization rules’ you can take into account the dynamics of the previous auctions and then automatically adjust black and white lists for your next campaigns accordingly. The system will prioritize suitable traffic sources and weed out undesirable ones, which in turn will lead to much better targeting and budget optimization. Taking examples below let’s review how to configure this feature in your dashboard so that you could serve ads on inventory sources that are right for you.
How to configure optimization rules in your DSP?
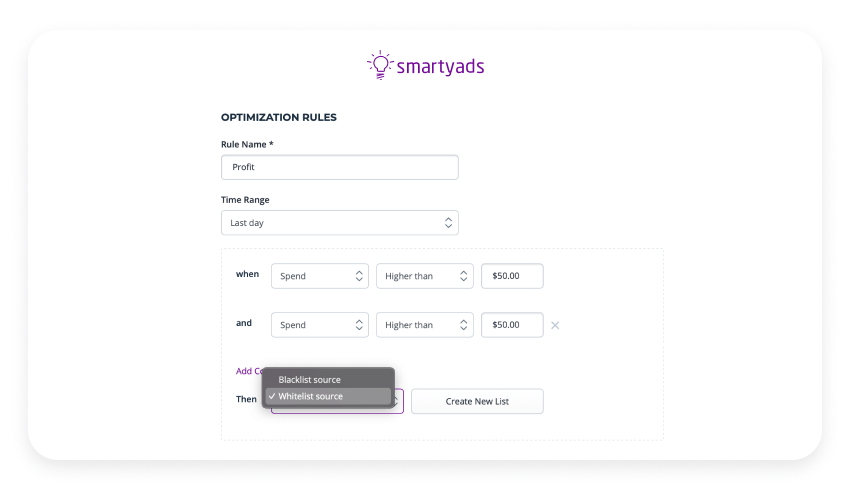
For starters, you need to log in to the DSP platform, go to the “Campaigns’ tab, and open campaign settings. Here you will find optimization rules. Using these rules you will instruct the system and put in a condition or several ones according to which traffic sources will be automatically attributed to the white or blacklists (during a particular selected period/time range). Below you can see the screenshot with settings that you can fine-tune.
How to put in a condition?
Before you can set the rules you have to choose ‘Then’ at the bottom of the form - which is what you create the rules for: to whitelist the source or blacklist the source (if it matches conditions).
Alternatively, you can create a new filter list by clicking on the “Create New List” button. In this case, you’ll need to fill the details in the form that pops up on the screen:
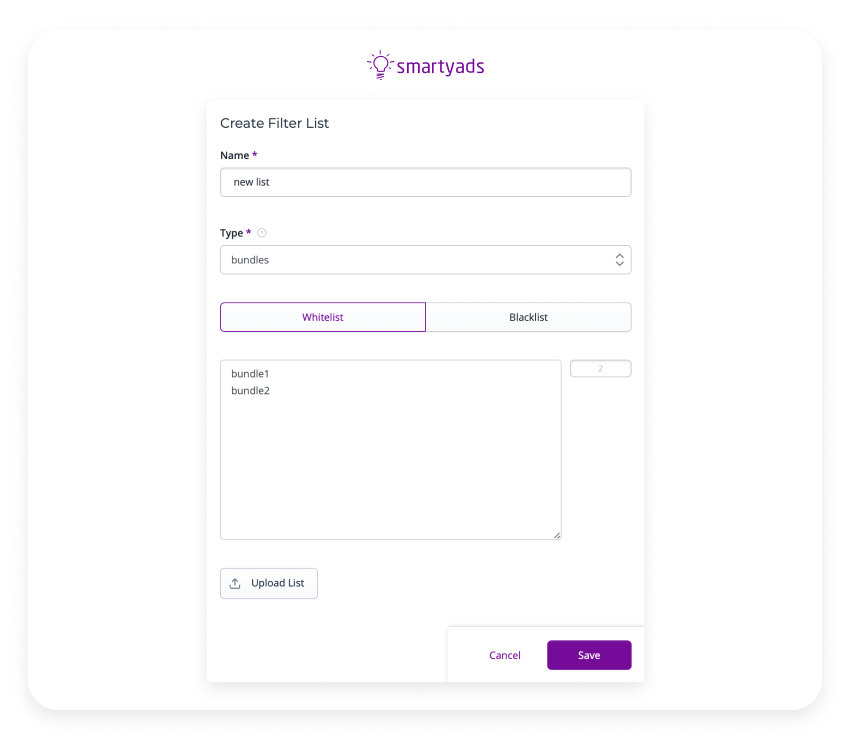
- Give a name to your list
- Select according to what entity types you want to filter: bundles (for in-app campaigns) or domains (for mobile web and desktop campaigns).
- You can also upload and use the existing list of entities to blacklist or whitelist. For this hit the button “Upload List” and you are all set.
- Save changes
Setting the condition: For instance, you can blacklist the domains when the CTR on the source appears to be lower than, let’s say 0.1%, or put it into a whitelist in case CTR is higher than or equal to the selected range. Same way with clicks, win rates, impressions, and spend.
Time range. Selecting the right time range is important. For example, you set the rule according to which Spend should be higher than $300 a week but your campaign has spent only $250 during this period, in this case, the condition is not met. If it spends more than $300 during a week then the condition is met.
Adding several conditions. If you have plenty of rules in mind to apply - you can set up to 3 conditions at once. As soon as you define your first condition, add the new one by clicking ‘add condition’. While doing it you will notice that the system offers you to select how the previous condition will work with the new one - ‘AND’ or ‘OR’. ‘AND’ means that the new condition should work in combination with the first one. Meanwhile, “OR’ is of lower priority and indicates the choice between conditions.

Pro tips from SmartyAds
To give you a hint considering practices of the configuration of this feature we decided to provide you with an example of how it can be done.
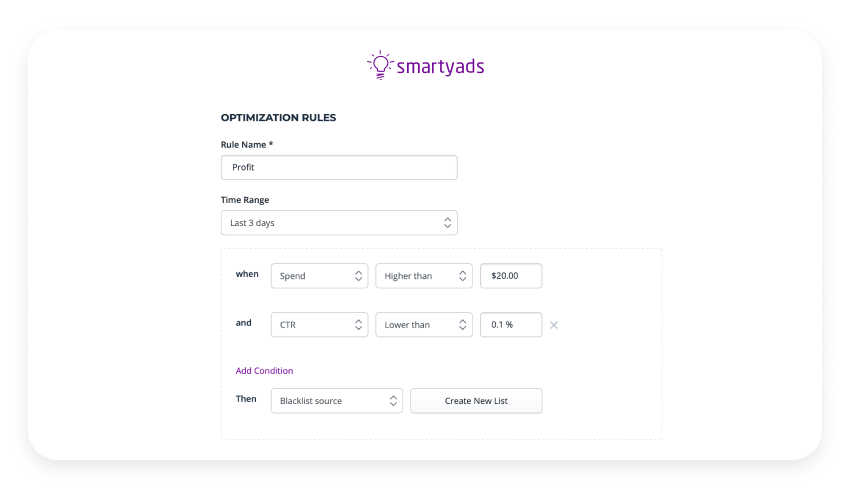
Rule #1:
- Time range: last 3 days
- Conditions: When spend is higher than $20 and CTR lower than 0.1%
- Then: send to blacklist
- On the screen, above you can see that when spend is higher than $20 and the CTR is lower than 0.1% the system automatically blacklists the source.
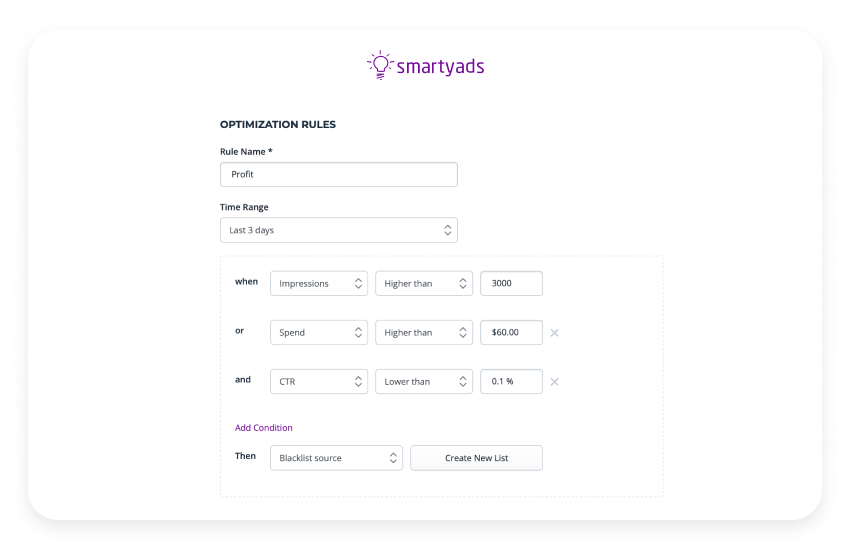
Rule #2:
- Time range: last 3 days
- Conditions: When impressions are higher than 30000 or spend is higher than $60 and CTR is lower than 0.1%
- Then: send to blacklist
- Another set of defined rules to send in the blacklist in case spend is higher than $60 and CTR is lower than 0.1% (for the sources whose impressions are higher than 30000).
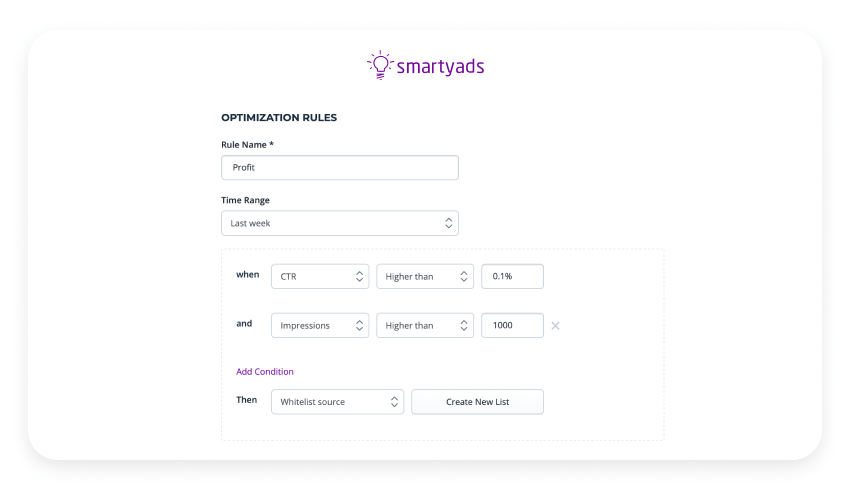
Rule #3:
- Time range: last week
- Conditions: When CTR is higher than 0.1% and impressions are higher than 1000
- Then: send to whitelist
- The last example shows us that conditions are selected to send sources with CTR higher than 0.1% to the whitelist. Plus, impressions should be higher than 1000.
To sum up
With the new optimization feature on DSP, you will have more freedom to prioritize certain traffic sources and avoid those that you think won’t work much in your favor. Choosing your own conditions you will always be sure that your ads are served on the sources that translate into better viewability, higher CTR, and optimal spend. Keep your eyes peeled for new updates, more useful functions are on the way!
Set your campaign for success on SmartyAds DSP!